
 English
 中文简体

How to Inspect a Dredger Hopper Door for Leaks: A Practical Seal Checklist
Content
A hopper door leak is rarely a steel-plate problem first. On most trailing suction hopper dredgers, the leak path begins at the seal line: a hardened rubber lip, grit in the groove, a distorted coaming, or a hinge that has dropped just enough to unload the seal. Clean and dry the interface, check seal compression and hinge geometry, then confirm with a chalk test, water test, or ultrasonic thickness check before the next load. That sequence finds most leaks in one shift and avoids the expensive cycle of lost load, seal erosion, and repeated adjustment.
This guide is for superintendents, chief engineers, and yard inspectors who need a repeatable check. It covers the door, seal, coaming, hinges, hydraulic locking, and the records that show whether a leak is new or a trend. For the surrounding equipment, see our trailing suction hopper dredger components.
Start With the Seal Line, Not the Steel Plate
Hopper doors are large, heavy, and slow to repair, so it is tempting to focus on cracks and ignore the seal. In service, the seal is the first component to lose performance. Rubber takes a permanent set under load, grit embeds in the groove, and paint or scale on the coaming creates a false contact line. A door can look fully closed from deck and still pass fines at one corner.
Clean the seal groove and coaming contact band before judging. Remove mud, shell, dried cargo, and loose paint. Dry the surfaces; a wet seal can hide a cut and make a feeler gauge reading unreliable. If the door is below the waterline, use approved confined-space and diving procedures, and never open a door against water pressure. Check the two corners, the leading-edge centre, and the area near each hinge first.
A Practical Four-Stage Inspection Sequence
Stage 1: Visual and tactile check
Look for embedded grit, ozone cracking, compression set, and seal lip damage. Run a blunt feeler gauge around the contact band. A common shop-floor check is that a 0.5 mm gauge should not pass freely under a properly compressed seal at any point; if it does, mark the location and length. Check the coaming with a straightedge and look for pitting, weld cracks, and paint buildup on the sealing face. Paint on the contact band is a leak path.
Stage 2: Hinge and cylinder check
Measure hinge pin and bushing clearance against the OEM limit. Lubricate the hinges and operate the door through a full cycle. Watch for jerking, misalignment, and a door that lands hard on one side. For hydraulic cylinders, mark the rod with the door partly open and no load, wait ten minutes, and check for drift. A door that creeps open during sailing will lose load and erode the seal. Check pilot check valves, hose leaks, and cylinder internal bypass before adjusting the seal.
Stage 3: Leak confirmation tests
The chalk test is simple: coat the coaming contact band with chalk, close the door, reopen it, and inspect the transfer pattern. Even transfer means even compression; a bright or missing patch points to distortion or hinge sag. For suspect welds, use dye penetrant or a vacuum box if access allows. Ultrasonic thickness readings around hinge brackets and seal bars show whether corrosion is reducing stiffness. A controlled water test from inside the hopper is often more revealing than looking outside, because hull pressure can hide a small leak.
Stage 4: Documentation and trend
Record the seal contact map, hinge clearance, cylinder drift, and UT readings. Compare them with the previous inspection. A leak that returns after a seal change usually means the coaming is distorted, the hinge has moved, or the door structure is flexing. Adjustment without measurement tends to chase the same problem around the perimeter.
What to Measure and What to Record
Use a simple inspection sheet so the next crew can see what changed. The table below is a starting point; confirm all limits with the door OEM and the applicable class requirements.
| Inspection point | Method | What to look for | Why it matters |
|---|---|---|---|
| Seal line contact | Feeler gauge, chalk test | Cuts, hardening, gaps, uneven transfer | Direct leak path and load loss |
| Coaming flatness | Straightedge, visual | Pitting, weld distortion, paint buildup | Prevents even seal compression |
| Hinge pin and bushing | Micrometer, OEM clearance | Wear, ovality, poor lubrication | Door sag misaligns the seal |
| Hydraulic cylinder | Rod drift test, pressure check | Internal bypass, creeping door | Door can open under load |
| Door structure | UT, dye penetrant, visual | Cracks at hinges and seal bars | Sudden failure risk |
| Seal groove | Scrape and clean | Embedded grit, corrosion | Erodes a new seal |
Where Hopper Door Leaks Commonly Start
Seal groove and rubber seal
Grit trapped in the groove is the most common cause of a new leak after a seal change. The seal cannot seat if the groove is not clean and dry. Replace seals that are cut, swollen, or hard. Do not add shims or packers unless the door OEM approves; the seal compression window is narrow.
Coaming and seal bar
Corrosion pitting under the seal bar creates a path that a visual check from deck will miss. Clean to bare metal on the contact band before the chalk test. If pitting exceeds the OEM allowance, repair or renew the bar. Local weld repair must follow the approved procedure.
Hinge sag and door twist
Hinge wear lets the door drop. A small drop at the hinge becomes a visible gap at the far edge. Check the door for twist after a collision with a quay, a hard landing, or a heavy object in the hopper. If the door does not land evenly, fix the hinge before replacing the seal again.
Hydraulic locking and sequence
A cylinder that does not hold pressure can let the door creep open. Check the hydraulic circuit, not just the seal. If the door drifts after closing, isolate the cylinder and test for internal bypass. A door that is not mechanically locked should be treated as a potential leak source during loading and sailing.
Dry Dock vs Afloat: What Changes
In dry dock, inspect the outer seal, coaming, hinge brackets, and door structure directly. Use a straightedge, UT gauge, and chalk test without water pressure interfering. In service, work from the hopper side where access allows, look for sediment trails and wet patches along the seal line, and use a controlled water test if the procedure permits.
Do not rely on a diver's visual check alone. Combine it with an internal water-level drop test, hinge clearance measurement, and a review of door closing behaviour. If the door is below the waterline, any seal work needs an approved diving or ROV plan, confined-space entry control, and a permit. A leak that is acceptable in port may be unacceptable during loaded sailing because head pressure and door movement differ.
A workable schedule is a daily visual check from deck, a weekly seal-line check when operating, and a detailed measurement in dry dock or at major maintenance. Increase frequency after heavy weather, grounding, or debris contact.
Repair or Replace? Decision Rules
Replace the seal if it is cut, hardened, or permanently flattened. Repair the coaming if pitting or distortion is beyond the OEM allowance. Replace hinge bushings and pins when clearance exceeds the limit; do not compensate with seal packing. Treat cracks in the door structure or hinge brackets as an engineering issue, not a welding shortcut. A door repaired repeatedly at the same corner may need a new seal bar or a replacement door.
If the door structure or seal bar is beyond repair, replacement is often faster than repeated weld repairs. A replacement hopper door must match hinge centres, cylinder lugs, seal groove profile, and coaming interface. Keep a seal kit, hinge bushings, and cylinder seal kit in the critical spares list; a one-day wait for a seal can cost more than the spare.
For inspection records, spare-part matching, or a replacement door review, contact our team with the door drawing, hinge centres, and seal profile.
FAQ
How often should a hopper door be inspected for leaks?
A daily visual check from deck, a weekly seal-line check during active dredging, and a detailed measurement in dry dock or at major maintenance. Increase frequency after heavy weather, grounding, or debris contact.
Can a hopper door leak be fixed by adjusting the seal only?
Only if the seal is the sole cause. If hinge clearance is out of limit, the coaming is distorted, or the cylinder drifts, a new seal will leak again. Measure hinge geometry and cylinder drift before adjusting the seal.
What is the fastest field test for a hopper door leak?
A clean, dry chalk test on the coaming contact band. It shows uneven compression quickly. Follow it with a controlled water test or UT reading if the leak location is still unclear.
Hopper Door and Dredger Components from Sanyang
If inspection shows the seal bar, hinge brackets, or door structure are beyond repair, a matched replacement is often faster than repeated weld repairs. Taizhou Sanyang Heavy Machinery Co., Ltd., based in Taizhou, Jiangsu, designs and manufactures non-standard heavy machinery, including dredger components for trailing suction hopper dredgers.
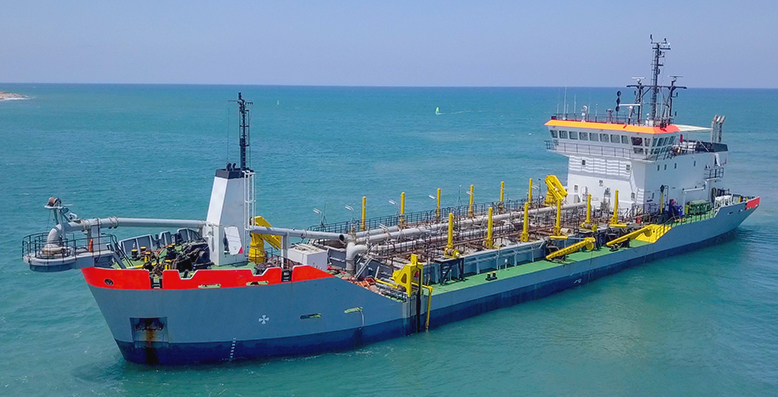
Dredger Hopper Door
Matched to your vessel's hinge centres, cylinder lugs, seal groove profile, and coaming interface. Send the door drawing and we will review the fit.
View details →Dredge Draghead
The suction head that works at the seabed on a trailing suction hopper dredger.
View details →Drag Pipe
The suction pipe line that carries the mixture from the draghead to the vessel.
View details →Swell Compensator
Helps keep the draghead in contact with the seabed as the vessel moves in swell.
View details →Why buyers choose Sanyang: highly wear-resistant materials, customization for various dredger models, ISO 9001 and CE certification, and in-house R&D, production, and testing.
Need a quote or a fit check? Contact our team or email sanyangjx@163.com with your door drawing, hinge centres, and seal profile.

Copyright 2025 Taizhou Sanyang Heavy Machinery Co., Ltd. All Rights Reserved Professional Dredging Equipment Manufacturer

Back To Top